The first time I tried to set up MetaMask I almost typed my seed phrase into a Google form. I caught it at the last second because something felt off. That moment — finger hovering over the keyboard, brain finally catching up — is the one most new Web3 users never write about. The interface trusts you. The internet doesn’t.
This is the post I wish I’d had on day one. The proper install, the rules of seed phrases, the networks you actually need, and the four security settings that stop 95% of MetaMask drains.
Short answer: MetaMask is the largest self-custody Web3 wallet, with over 30 million monthly active users and support for Ethereum plus 30+ EVM-compatible chains. You install it as a browser extension or mobile app, write down a 12-word seed phrase, and use it to connect to dApps like Uniswap, OpenSea, and Aave. The keys live on your device — not on a server, not at MetaMask. The seed phrase is the wallet. Lose it, lose everything. Share it, lose everything faster.
A Ledger hardware wallet plugs into MetaMask to keep keys offline → (affiliate)
Key takeaways
- MetaMask has 30M+ monthly active users — by far the most-used Web3 wallet.
- It supports Ethereum mainnet plus 30+ EVM-compatible chains: Polygon, Arbitrum, Optimism, Base, BSC, Avalanche, and more.
- The seed phrase is the single point of failure. Anyone with it owns your wallet. Forever.
- Fake MetaMask extensions are one of the most common crypto scams — only install from official sources.
- Plugging in a Ledger turns MetaMask into a hot interface for cold keys — the recommended setup once balances grow.
What MetaMask is
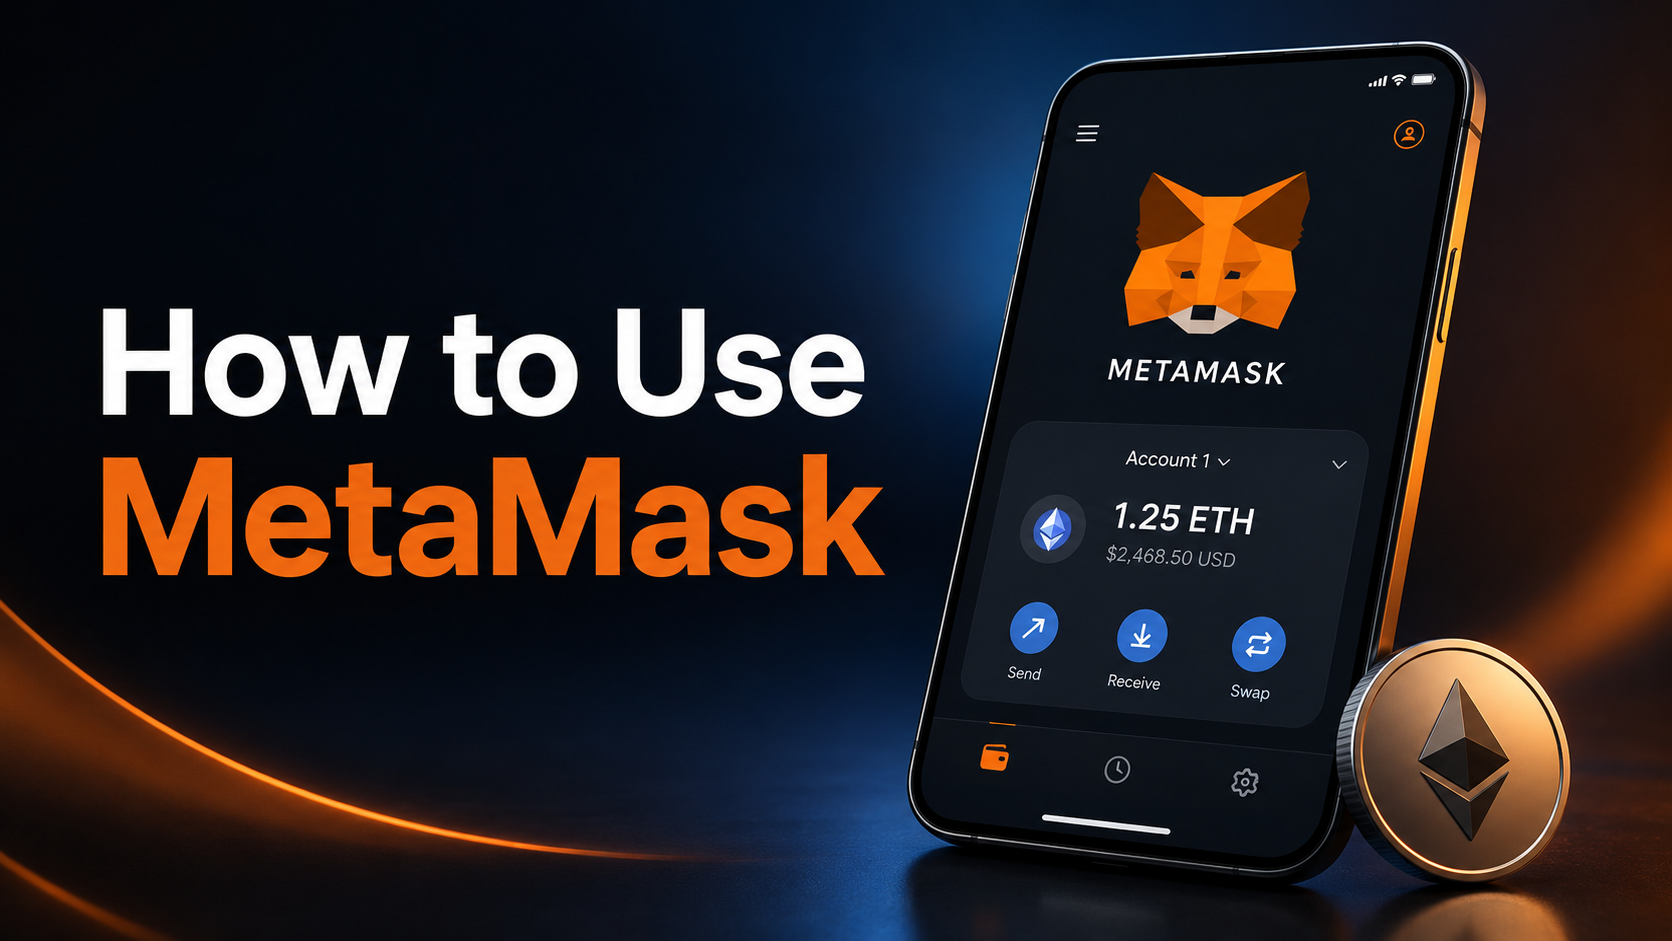
MetaMask is a self-custody Web3 wallet built by ConsenSys. It launched in 2016 as a browser extension and has since grown into a mobile app, a portfolio dashboard, a token swap interface, and a hardware wallet integration layer. As of writing, it has over 30 million monthly active users globally, making it the largest Web3 wallet by a wide margin.
It does three jobs.
One. It stores your private keys on your device. The keys never touch a MetaMask server. ConsenSys cannot see your funds, cannot freeze them, and cannot recover them if you lose your seed phrase.
Two. It signs blockchain transactions. When you want to swap on Uniswap, lend on Aave, or mint an NFT on OpenSea, MetaMask is what pops up and asks you to confirm. Your keys sign the transaction locally and broadcast it to the network.
Three. It connects to dApps. The “connect wallet” button on every Web3 site is essentially asking permission to talk to MetaMask. Once connected, the dApp can request transactions from your wallet — but you still have to approve each one.
It supports Ethereum mainnet and any EVM-compatible chain. That means Polygon, Arbitrum, Optimism, Base, BNB Smart Chain, Avalanche C-Chain, Fantom, Celo, and dozens more. Solana is not EVM-compatible, so MetaMask doesn’t natively support it without a Snap extension. Bitcoin isn’t EVM-compatible either.
For wider context on wallets in general, crypto wallets explained covers the categories and trade-offs.
Installing MetaMask — and the fake-extension danger
This is the step where most beginners get hit. Fake MetaMask extensions show up in the Chrome Web Store regularly. Some have hundreds of fake reviews. Some show up first in Google ads when you search “MetaMask download”. Installing the wrong one drains your wallet the moment you import a seed phrase.
The only places to install MetaMask
Use these URLs directly. Don’t search Google. Don’t click ads.
- Browser extension (Chrome, Brave, Edge): Go to metamask.io and click “Download”. The site redirects you to the official Chrome Web Store entry.
- Firefox: Same — start at metamask.io.
- iOS: App Store, search “MetaMask”. Publisher must be ConsenSys Software Inc.
- Android: Google Play, search “MetaMask”. Publisher must be ConsenSys Software Inc.
The mobile apps have over 10 million downloads each. The fake apps usually have under 10,000. Always check the publisher name and the download count.
Red flags in fake extensions
- Publisher not “ConsenSys” or “MetaMask”
- Fewer than 1,000 ratings
- Recently uploaded
- Asks for permissions it doesn’t need
- Asks for your seed phrase outside the standard import flow
If anything looks off, stop. Delete it. Install from metamask.io.
After install
The first thing MetaMask shows you is a welcome screen with two options: “Create a new wallet” or “Import an existing wallet”. For first-time users, create a new wallet. For users migrating from another wallet, import.
Creating your first MetaMask wallet — the seed phrase rules
The setup itself is straightforward. The decisions you make about your seed phrase determine whether your wallet survives the next five years.
The flow
- Click “Create a new wallet”.
- Set a password. This password unlocks the extension on your device — it’s not your wallet. Anyone with your seed phrase doesn’t need this password.
- MetaMask shows you a 12-word seed phrase. Reveal it. Write it down on paper. Confirm the words in the right order.
- You’re in.
The rules of seed phrases — non-negotiable
Write it on paper. Two copies. Physical, not digital. No screenshots. No password manager. No iCloud. No Google Drive. No email to yourself. No photo of the paper. The moment a seed phrase touches the internet, it’s compromised.
Store the two copies in physically different locations. One at home, one in a safe deposit box, one at a relative’s house. Anywhere a single fire, flood, or burglary can’t destroy both.
Never type it into any website. MetaMask itself only asks for the seed phrase during initial wallet setup or import. If any site asks you to type your seed phrase outside that exact flow, it’s a scam. Always.
Never share it. Not with support. Not with developers. Not with anyone. Real support never asks for your seed phrase. Anyone who does is stealing.
Use a steel backup if you can afford one. Devices like Cryptotag or Blockplate let you stamp the seed phrase into steel that survives fire, water, and time. About $50–$100. Worth it for any meaningful balance.
The complete playbook is in seed phrase storage — including what to do if you ever suspect a phrase has been exposed.
What happens if you lose the seed
You lose everything in the wallet. No recovery. No reset. No password help. MetaMask cannot help. ConsenSys cannot help. The blockchain doesn’t care. This is the trade-off of self-custody.
If you’ve already lost or exposed a phrase, lost seed phrase covers the realistic options — most of which are damage control rather than recovery.
Importing vs creating a wallet
When you install MetaMask, you’re presented with both options.
Create a new wallet
Use this if MetaMask is your first Web3 wallet, or if you want a fresh wallet not tied to your existing setup. MetaMask generates a new 12-word seed phrase. You write it down. You start with zero funds.
Import an existing wallet
Use this if you already have a seed phrase from another wallet (Trust Wallet, Coinbase Wallet, BitGet Wallet, hardware wallet) that you want to access in MetaMask. You type in the 12 or 24 word phrase. MetaMask derives the same addresses and balances.
A few notes on importing.
Same seed = same accounts. If you import a seed into MetaMask that already has activity on another wallet, you’ll see those balances. Both wallets can sign transactions on the same accounts — but you only need one wallet to control the funds at any time.
Derivation paths matter. Some wallets use non-standard derivation paths. If you import a seed and the balances don’t show up, check whether the source wallet used a custom path. MetaMask uses the standard Ethereum BIP-44 path by default.
Importing doesn’t move funds. Funds stay on-chain. The wallet is just a key. You can import the same seed into ten wallets and the funds are still in the same place.
Best practice
If you’re starting fresh, create a new wallet specifically in MetaMask. Use it as your “hot wallet” for daily DeFi activity. Keep larger balances on a hardware wallet (see the Ledger section below) and connect that to MetaMask separately. Don’t import a long-standing seed phrase from a hardware wallet into MetaMask as software — that defeats the purpose of having cold storage.
Adding networks to MetaMask
By default, MetaMask comes with Ethereum mainnet, Sepolia testnet, and a few others enabled. To use Polygon, Arbitrum, Optimism, Base, or BNB Smart Chain, you need to add them.
Polygon
- Open MetaMask. Click the network selector at the top.
- Click “Add network”.
- Choose Polygon (Matic) from the popular list. Or add manually:
– Network Name: Polygon Mainnet
– RPC URL: https://polygon-rpc.com
– Chain ID: 137
– Symbol: POL (formerly MATIC)
– Block Explorer: https://polygonscan.com
Arbitrum One
- Network Name: Arbitrum One
- RPC URL: https://arb1.arbitrum.io/rpc
- Chain ID: 42161
- Symbol: ETH
- Block Explorer: https://arbiscan.io
Optimism
- Network Name: OP Mainnet
- RPC URL: https://mainnet.optimism.io
- Chain ID: 10
- Symbol: ETH
- Block Explorer: https://optimistic.etherscan.io
Base
- Network Name: Base
- RPC URL: https://mainnet.base.org
- Chain ID: 8453
- Symbol: ETH
- Block Explorer: https://basescan.org
BNB Smart Chain
- Network Name: BNB Smart Chain
- RPC URL: https://bsc-dataseed.binance.org
- Chain ID: 56
- Symbol: BNB
- Block Explorer: https://bscscan.com
Easier shortcut
Use chainlist.org — search for a network, connect MetaMask, hit “Add to wallet”. One click, no typing.
Each network needs its own gas token. ETH on mainnet, ARB or ETH on Arbitrum, MATIC/POL on Polygon, BNB on BSC. You can’t pay gas in USDC.
Receiving tokens
This is the simplest interaction. Surprisingly easy to get wrong.
How to receive
- Open MetaMask.
- Make sure you’re on the right network. Polygon USDC and Ethereum USDC are different tokens at different addresses. Receiving Polygon USDC at an Ethereum address means it’s gone.
- Click your account name or the receive icon. Your wallet address appears.
- Copy it or scan the QR code.
- Send from the source. The transaction confirms in seconds (L2) or minutes (mainnet).
The network mistake
Each EVM chain has a different version of the same address space. The address starts with 0x and looks identical across chains. If someone sends you 100 USDC on BNB Smart Chain when you expected Ethereum USDC, the funds arrive at the same address — but on BSC, where it shows as BSC-USDC.
To see it, you need to switch MetaMask to BSC and add USDC as a custom token. The funds aren’t lost. They’re just on a different chain than you expected.
When buying on a CEX and withdrawing to MetaMask, double-check the withdrawal network matches what you’ve set up in MetaMask. BitGet (affiliate), Binance, and most major exchanges let you pick the network. Pick wrong and you’ll spend a stressful afternoon figuring out where your money went.
Sending tokens
The opposite direction. Same gotchas, multiplied.
How to send
- Open MetaMask. Confirm correct network.
- Click Send.
- Paste the recipient address. Double-check the first 6 and last 6 characters match what the recipient gave you.
- Pick the token. Confirm balance is sufficient. Remember gas — you need extra of the native token (ETH, MATIC, BNB) to pay fees.
- Enter the amount.
- Review the gas fee. If it looks high, you can wait or switch to a cheaper network.
- Click Confirm.
- Transaction is broadcast to the network. Confirmation takes seconds on L2s, 30 seconds to several minutes on mainnet.
Common send mistakes
Wrong network. Sending mainnet USDC to a Polygon-only address loses the funds.
Wrong address. Pasting an address corrupted by malware (clipboard hijackers replace addresses on copy). Always verify the full string.
No gas. You’re sending USDC but you have no ETH (or MATIC, BNB, etc.) for gas. Transaction fails.
Insufficient slippage if using Send through a swap. Doesn’t apply to direct sends, but worth knowing if you use MetaMask’s built-in swap.
The how to send Bitcoin post covers the BTC-specific version of this for comparison.
Connecting to dApps — the Uniswap walkthrough
This is what MetaMask is for. Connecting to decentralised applications.
The general flow
- Visit the dApp’s official URL (always type or use a bookmark — never click ads).
- Click “Connect Wallet”.
- Choose MetaMask from the list of supported wallets.
- MetaMask pops up asking permission to connect.
- Review the requested permissions. Click “Next” or “Connect”.
- Your wallet is now connected. The dApp can see your address and request transactions.
Uniswap example
How to use Uniswap covers the full Uniswap workflow. Quick version:
- Visit app.uniswap.org.
- Connect MetaMask. Approve the connection.
- Pick tokens to swap. Set slippage tolerance.
- Approve the token spend (first time only for that token).
- Hit Swap. Confirm in MetaMask. Wait for confirmation.
The trickiest part is the approval step — see the next section.
When to disconnect
After you’re done with a dApp, disconnect. Open MetaMask, click the dot in the top-right corner, select “Connected sites”, remove the dApp. This doesn’t revoke any token approvals — for that, see the next section.
Approving token spends — the malicious approval trap
This is where most MetaMask drains happen. Not phishing. Not hacks. Token approvals.
What an approval is
When you swap a token on Uniswap (or any DeFi protocol), the smart contract needs permission to move your tokens. You grant that permission with an “approval” transaction. The approval is recorded on-chain. The protocol can then spend up to the amount you approved.
By default, many dApps request “unlimited” approval — meaning the protocol can move any amount of your tokens, any time, forever. This is convenient. It also means a single exploited or malicious contract can drain your entire balance of that token.
How the scam works
Bad actor creates a malicious dApp. You connect MetaMask. You approve a token spend, not realising it’s unlimited. The malicious contract immediately spends every token you have. Game over.
Or: legitimate dApp gets exploited later. The exploiter inherits all the unlimited approvals users have granted. Drains every connected wallet that granted unlimited approval.
This has happened multiple times — large protocols hacked, with the bulk of stolen funds coming from outstanding token approvals rather than the protocol’s own treasury.
How to protect yourself
Always set a custom approval amount. When MetaMask shows the approval dialog, click “Edit permission” and set the approval to exactly the amount you’re swapping, plus a small buffer. Not unlimited. Yes, you’ll have to re-approve next time you swap. Yes, it costs extra gas. Yes, it’s worth it.
Revoke unused approvals. Use revoke.cash to see every active approval on your wallet across every chain. Revoke any you don’t need. Revoke every approval to any dApp you no longer use.
Audit before signing. When MetaMask pops up an approval, read what it’s approving. If the contract address doesn’t match the dApp you think you’re using, stop. If the approval amount is unlimited and you’re trying to swap $100, stop.
Once a year — minimum — I do a full revoke.cash audit on every wallet. Takes 10 minutes. Has saved me at least once.
The crypto scams guide covers the broader category including phishing, fake support, address poisoning, and seed-phrase fishing.
Hardware wallet integration — connecting Ledger to MetaMask
This is the upgrade I recommend the moment your wallet balance is above what you’d be comfortable losing in a single bad approval.
Why hardware wallets matter
A hardware wallet stores your private keys offline on a dedicated device. The keys never touch your computer. Even if your laptop is compromised by malware, the keys remain safe — every transaction requires physical button confirmation on the hardware device itself.
MetaMask supports Ledger (recommended), Trezor, and a few others. The Ledger Nano X review covers the device in detail. The full Ledger (affiliate) store is here.
How to connect Ledger to MetaMask
- Set up your Ledger device first (separately from MetaMask). The Ledger comes with its own seed phrase setup process.
- Install the Ethereum app on the Ledger via Ledger Live.
- Open MetaMask. Click your account icon, then “Add hardware wallet”.
- Choose Ledger. Plug in the device. Unlock it with the PIN.
- Open the Ethereum app on the Ledger.
- MetaMask shows a list of Ledger-derived Ethereum addresses. Pick one (or several). Click Continue.
- The Ledger account appears in MetaMask as a separate account.
What this gives you
The MetaMask interface still works as normal. You connect to dApps, swap on Uniswap, sign transactions — but every transaction requires you to press the buttons on the Ledger to confirm. The keys never leave the device.
If your laptop is fully compromised, an attacker can still see your balance, can still see what dApps you connect to — but they can’t move your funds without the physical Ledger. That’s the security model.
The split I run
I have two MetaMask accounts in the same extension. A software-only account for daily DeFi tinkering with small balances. A Ledger-backed account for anything material. I move funds between them as needed. The software wallet is the throwaway. The Ledger account is the vault.
The hot vs cold wallet post covers why this split matters.
NordVPN for Web3 connection privacy
A note on the privacy layer most Web3 users skip.
When you use MetaMask, you’re connecting to RPC providers — Infura by default, often other providers for L2s. Those providers see your IP address every time you make a transaction. They can link your wallet address to your network location.
For most users this is a low-priority concern. For users in restrictive jurisdictions, frequent travellers using public WiFi, or anyone who simply doesn’t want a third party building a behavioural profile of their on-chain activity, a VPN matters.
I use NordVPN (affiliate) on any device I trade or sign transactions from. It’s not a perfect privacy solution — your wallet address is still public on-chain — but it cuts the link between your home IP and the RPC providers that index DeFi activity. Public WiFi is also the most common place account takeovers begin. A VPN closes that vector cheaply.
The other half of Web3 privacy is the wallet you choose for sensitive activity. Burner wallets, separate browser profiles, hardware separation — same principles as any other operational security.
Pair MetaMask with a Ledger and the threat model changes.
A Ledger Nano X plugs into MetaMask as a hardware-backed account. The keys never leave the device, even when the wallet interface is online.
Affiliate link. I may earn a commission at no extra cost to you.
MetaMask alternatives worth knowing
MetaMask is the default. It’s not always the best.
Rabby
Rabby is a newer browser wallet built by the team behind DeBank. It’s MetaMask-compatible (uses the same seed format), but the interface is sharper for multi-chain users — better transaction simulation, clearer warnings on risky approvals, automatic network detection when you visit a dApp. For DeFi power users, Rabby is the upgrade. For beginners, MetaMask is still the more documented option.
BitGet Wallet
BitGet Wallet is BitGet’s self-custody Web3 wallet (formerly BitKeep). Multi-chain by default — covers EVM chains, Solana, TON, BTC, and more in one wallet. Integrates with BitGet exchange for easier on/off ramp. Available as a mobile app and browser extension. Worth considering if you want one wallet across Ethereum, Solana, and Bitcoin without juggling three apps.
Coinbase Wallet
Separate from the Coinbase exchange app. Self-custody Web3 wallet, fine UI, good iOS app. The trade-off is some advanced features are missing compared to MetaMask, and it pushes you toward Coinbase products.
Phantom
Started as a Solana wallet, now multi-chain. Good UI, popular for Solana DeFi. Worth a look if you spend time on Solana.
The honest answer
MetaMask is the default because the documentation, the dApp support, and the community knowledge are unmatched. If you want a single recommendation, start with MetaMask. Once you’ve made 50 transactions and you understand the model, evaluate whether Rabby or BitGet Wallet fits better.
Common scams targeting MetaMask users
A quick checklist of the patterns I see hit beginners.
Seed phrase phishing
Fake support agents on Discord, Twitter, Telegram, or fake “MetaMask support” sites asking you to type your seed phrase to “recover” your wallet. Always a scam. There is no MetaMask support that asks for seed phrases. Ever.
Fake browser extensions
Discussed above. Always install from metamask.io.
Fake airdrops
Email or DM telling you to claim a free token by connecting to a website. The site asks you to sign a transaction. The transaction transfers your real tokens out. The “free token” is a lure.
Address poisoning
Scammer sends you a tiny amount of crypto from an address that looks similar to one you’ve sent to before — same first 6 and last 6 characters, different middle. You copy the wrong address from your transaction history next time you send. Funds gone.
Defence: never copy addresses from your transaction history. Use saved address book entries.
Sandwich attacks
Discussed in the Uniswap section but worth repeating. High slippage tolerance on DEX swaps gets your trade sandwiched by MEV bots. Use realistic slippage and private RPCs.
Approval drains
Discussed above. The most common vector. Limit approvals to exact amounts.
The base rule
Slow down. Read what MetaMask is asking you to sign. If you don’t understand the transaction, don’t sign it. The interface defaults to convenience. You have to default to caution.
The crypto scams guide covers the full taxonomy.
Buying ETH to fund MetaMask
This is the on-ramp. Two main paths.
CEX → MetaMask
Buy ETH on a centralised exchange, then withdraw to your MetaMask address.
- Sign up for BitGet (affiliate). The BitGet review covers the platform.
- Deposit fiat or buy with card.
- Buy ETH spot. 0.10% fee.
- Withdraw to MetaMask. Pick the right network — mainnet, Arbitrum, Base, Optimism, depending on where you want to use it.
- Funds arrive in 5–15 minutes.
For more options, how to buy Ethereum covers the alternatives.
Direct on-ramp via MetaMask
MetaMask has a built-in buy option that connects you with third-party providers (Transak, MoonPay, others). You buy ETH directly to your wallet using a card or bank transfer. Convenient. Fees are usually 2–5% — significantly higher than going through a CEX.
For trades above $50, the CEX route is almost always cheaper.
Securing your MetaMask — the lockdown checklist
Five settings to change before you put any meaningful balance in MetaMask.
1. Use a strong password
The local password unlocks MetaMask on your device. Use a 16+ character random string from a password manager. Doesn’t replace the seed phrase — but adds a layer if your laptop is briefly accessed.
2. Enable phishing detection
MetaMask has built-in phishing detection. Settings → Security & Privacy → toggle Phishing Detection. It blocks known malicious URLs and warns on suspicious ones.
3. Show conversion rates (off if privacy matters)
MetaMask checks balance values via third-party price APIs. If you want to minimise data leakage, turn this off. Doesn’t change security.
4. Use Hardware Wallet for high-value accounts
Discussed in the Ledger section. The single biggest security upgrade you can make.
5. Audit token approvals regularly
Once a quarter, run through revoke.cash and revoke unused approvals. Takes minutes. Closes the most common drain vector.
Ready to lock it down?
A Ledger Nano X plugs into MetaMask, takes the private keys offline, and turns MetaMask into a clean front-end for cold storage. The setup that’s saved more crypto than any other.
Affiliate link.
Frequently asked questions
Is MetaMask safe to use?
MetaMask itself is safe — it’s the most-used self-custody wallet with over 30 million monthly users. The risks come from how you use it: seed phrase exposure, fake extensions, malicious approvals, and phishing sites. Following the security checklist in this post stops most of the common attack vectors.
What chains does MetaMask support?
MetaMask supports Ethereum and any EVM-compatible chain — including Polygon, Arbitrum, Optimism, Base, BNB Smart Chain, Avalanche, Fantom, Celo, and dozens more. It does not natively support Bitcoin or Solana without third-party Snap extensions.
Can MetaMask be hacked?
The MetaMask software itself has not been hacked at the protocol level. Individual wallets get drained through user-side mistakes: seed phrase exposure, malicious approvals, phishing sites, compromised devices. Hardware wallet integration drastically reduces these risks.
Do I need to KYC for MetaMask?
No. MetaMask is self-custody and requires no identity verification. You install the extension or app, create a wallet, and start using it. The built-in fiat on-ramp (Transak, MoonPay) does require KYC because it involves card payments.
How is MetaMask different from a Ledger?
MetaMask is a software wallet — keys stored on your computer or phone. Ledger is a hardware wallet — keys stored on a dedicated offline device. The two work together: you can connect a Ledger to MetaMask and use the MetaMask interface while keys stay on the Ledger. That’s the recommended setup for meaningful balances.
Can I recover my MetaMask if I lose my seed phrase?
No. The seed phrase is the only way to recover a self-custody wallet. MetaMask and ConsenSys cannot help. There’s no password reset. This is the trade-off of self-custody — full control, full responsibility.
Are MetaMask fees high?
MetaMask itself charges no fees for using the wallet. Network gas fees apply to every transaction. MetaMask’s built-in swap and buy features include third-party fees of around 0.875% (swap) and 2-5% (buy). Direct interactions with dApps like Uniswap go through that protocol’s own fee structure.
Should I use MetaMask or BitGet Wallet?
MetaMask is the EVM standard with the largest dApp support. BitGet Wallet is multi-chain including Solana, TON, and Bitcoin — useful if you operate across non-EVM ecosystems. For Ethereum and EVM-only users, MetaMask is the default. For multi-chain users, BitGet Wallet is worth considering.
Final word
MetaMask is the gateway to most of Web3. It’s also the place where most beginners get hurt — not because the wallet is bad, but because the rules of self-custody are unforgiving and the interface trusts you to know them.
Get the basics right and MetaMask is a reliable, well-supported wallet that has held up across years of bull and bear markets. The rules are simple: install from the right source, write the seed phrase on paper, never type it anywhere, limit token approvals, add a hardware wallet once balances grow, and audit approvals quarterly.
If I were starting again today, this is the order I’d do it in:
- Install MetaMask from metamask.io. Confirm publisher is ConsenSys.
- Create a new wallet. Write the seed phrase on paper. Make two copies in different locations.
- Add Arbitrum, Base, and Polygon as networks.
- Buy $50 of ETH on BitGet. Withdraw to MetaMask on Base. Make one swap on Uniswap to learn the flow.
- Buy a Ledger. Connect it as a second account in MetaMask. Move anything material to the Ledger account.
- Run revoke.cash once a quarter from then on.
Right — over to you.
Related posts
- Ledger Nano X Review: My Long-Term Cold Storage
- How to Use Uniswap: A Beginner’s Walkthrough
- Seed Phrase Storage: How to Keep Your Recovery Safe