The first time I used Uniswap I paid $42 in gas to swap $50 worth of ETH for a token that dumped 30% the following morning. Welcome to DeFi. The site doesn’t warn you. The interface doesn’t flinch. You hit the button and the network charges you what it charges you.
This is the post I wish I’d read before that swap. How Uniswap actually works, what slippage really costs you, why MEV bots are eating your trades, and when you should just use a centralised exchange instead.
Short answer: Uniswap is the largest decentralised exchange in crypto, running on Ethereum and a dozen Layer 2 chains. You connect a Web3 wallet like MetaMask, pick two tokens, set your slippage tolerance, and the protocol’s automated market maker (AMM) executes the trade against a liquidity pool. Total value locked across all versions sits around $4 billion, and Uniswap V4 is the current flagship. Use it when you need access to a token a CEX doesn’t list. Use a CEX when you don’t.
I use BitGet when speed and low fees matter more than DEX coverage → (affiliate)
Key takeaways
- Uniswap is the largest DEX in crypto with around $4 billion total value locked across all versions.
- The protocol uses an automated market maker (AMM) model — no order book, no human market makers, just liquidity pools.
- Gas fees can range from $0.10 on L2s like Base or Arbitrum to $40+ on Ethereum mainnet during congestion.
- Slippage tolerance is the setting that protects you from MEV sandwich attacks — most beginners set it wrong.
- Providing liquidity earns fees but exposes you to impermanent loss — a permanent risk if prices diverge sharply.
What Uniswap is
Uniswap is the largest decentralised exchange on Ethereum. It launched in 2018, pioneered the automated market maker model that now powers most DEXs, and has processed over $2.5 trillion in lifetime trading volume. Total value locked across all Uniswap versions sits around $4 billion, depending on market conditions. The protocol is permissionless — anyone can list any token by creating a liquidity pool. Anyone can trade. There’s no KYC, no signup, no central authority.
You interact with it through a Web3 wallet. MetaMask is the most common, but Rabby, BitGet Wallet, and any other EVM wallet works. The Uniswap front-end at app.uniswap.org is the interface most people use. The underlying smart contracts run on Ethereum mainnet plus a growing list of L2s — Arbitrum, Optimism, Base, Polygon, Avalanche, and others.
The protocol earns no protocol fees by default (V2). V3 and V4 introduced optional fee tiers paid to liquidity providers. Uniswap Labs, the company that built the front-end, charges a small fee on swaps through their hosted interface — currently around 0.25% on most pairs. The Uniswap docs lay this out at docs.uniswap.org.
For broader context on what an exchange is, crypto exchanges explained covers the difference between CEX and DEX in plain English.
How AMMs work — the constant product formula simply
This is the bit that makes DeFi click once you get it.
The pool model
A Uniswap liquidity pool holds two tokens — let’s say ETH and USDC. Imagine the pool contains 100 ETH and 300,000 USDC. The product of the two balances is 100 × 300,000 = 30,000,000. This product is what the protocol tries to keep constant.
When you swap, the protocol adjusts the balances so that the product stays the same (minus fees). If you sell 1 ETH into the pool, the ETH side increases to 101. To keep the product at 30,000,000, the USDC side drops to roughly 297,030 — meaning you receive about 2,970 USDC for your 1 ETH. The price was approximately 3,000 USDC per ETH before your trade, slightly less after.
That’s the constant product formula: x × y = k. Three letters that power most of DeFi.
Why this matters for you as a trader
The bigger your trade relative to the pool, the worse your price. A $1,000 trade in a $1 million pool barely moves the price. A $100,000 trade in the same pool eats a chunk of the liquidity and you pay a noticeably worse rate. This is “price impact” — Uniswap shows it on every swap.
Always check the price impact line. If it shows more than 1%, your trade is moving the market against you. Above 5% and you’re getting fleeced. Either find a deeper pool, split the trade across multiple sources, or use a CEX instead.
How LPs make money
Liquidity providers deposit pairs of tokens into pools and earn a share of the trading fees — typically 0.05%, 0.30%, or 1% per swap, depending on the pool’s fee tier. The deeper the pool’s volume relative to its TVL, the higher the yield. We’ll come back to this — it’s not the free lunch it looks like.
Uniswap V2 vs V3 vs V4
Multiple versions of Uniswap coexist. You’ll see them named V2, V3, and V4 across the interface. The differences matter.
Uniswap V2
V2 launched in 2020. Every pool is a 50/50 pair. Liquidity is spread evenly across all possible prices from zero to infinity. Simple, battle-tested, still widely used for long-tail tokens.
V2’s design is gas-efficient and reliable. The trade-off is capital inefficiency — most of the liquidity sits at prices that never trade, so LPs earn lower returns on their capital.
Uniswap V3
V3 launched in 2021 and changed everything. LPs can now concentrate their liquidity within specific price ranges. Provide ETH/USDC liquidity between $2,900 and $3,100 and you earn way more fees on the same capital — as long as the price stays in that range.
The trade-off is active management. If price moves outside your range, you stop earning fees and you’re holding 100% of the underperforming token. V3 turned passive LPing into something closer to active position management.
Uniswap V4
V4 launched in 2024 and introduced “hooks” — custom smart contracts that can run logic at specific points in a swap. Limit orders. Dynamic fees. Time-weighted average price (TWAP) execution. On-chain custom strategies. It’s a kit for building any kind of AMM behaviour on top of Uniswap’s plumbing.
For most retail users, V4 looks the same as V3 from the front-end. The difference shows up in advanced strategies and in the fees you pay — V4 pools are often more gas-efficient.
The version your swap routes through depends on the pool with the best price at execution time. Uniswap’s router picks for you. You don’t need to think about it most of the time.
Connecting MetaMask to Uniswap (step-by-step)
This is the on-ramp to actually using the protocol. Three minutes, no friction if your wallet is already funded.
Step 1: Have a wallet ready
If you don’t have one, how to use MetaMask covers the setup from scratch. Make sure it’s funded with ETH on whichever network you want to trade — ETH on mainnet costs more in gas, ETH on Base or Arbitrum costs cents.
Step 2: Visit app.uniswap.org
Go to app.uniswap.org. Bookmark this URL. There are hundreds of phishing sites with similar names. Always type the URL or use a bookmark — never click a Google ad or social media link.
Step 3: Connect wallet
Top-right corner, “Connect” button. Choose MetaMask (or whichever wallet you’re using). A pop-up appears asking permission to connect. Confirm.
You’re now connected. Your wallet address appears in the top corner. The interface shows your token balances on whichever network MetaMask is currently set to.
Step 4: Switch networks (optional)
If you’re on Ethereum mainnet and gas fees are above a few dollars, switch MetaMask to an L2. Click the network selector in MetaMask, pick Arbitrum, Base, Optimism, or Polygon. Uniswap detects the switch and shows pools on that chain. Gas drops dramatically.
You’ll need a small amount of native ETH on that L2 to pay gas. Bridge from mainnet using the official bridge for each L2, or buy directly on a CEX like BitGet and withdraw to the L2 network.
Step 5: You’re in
You’re connected. Now you can swap.
How to swap tokens on Uniswap
The actual swap workflow, click by click.
Pick the tokens
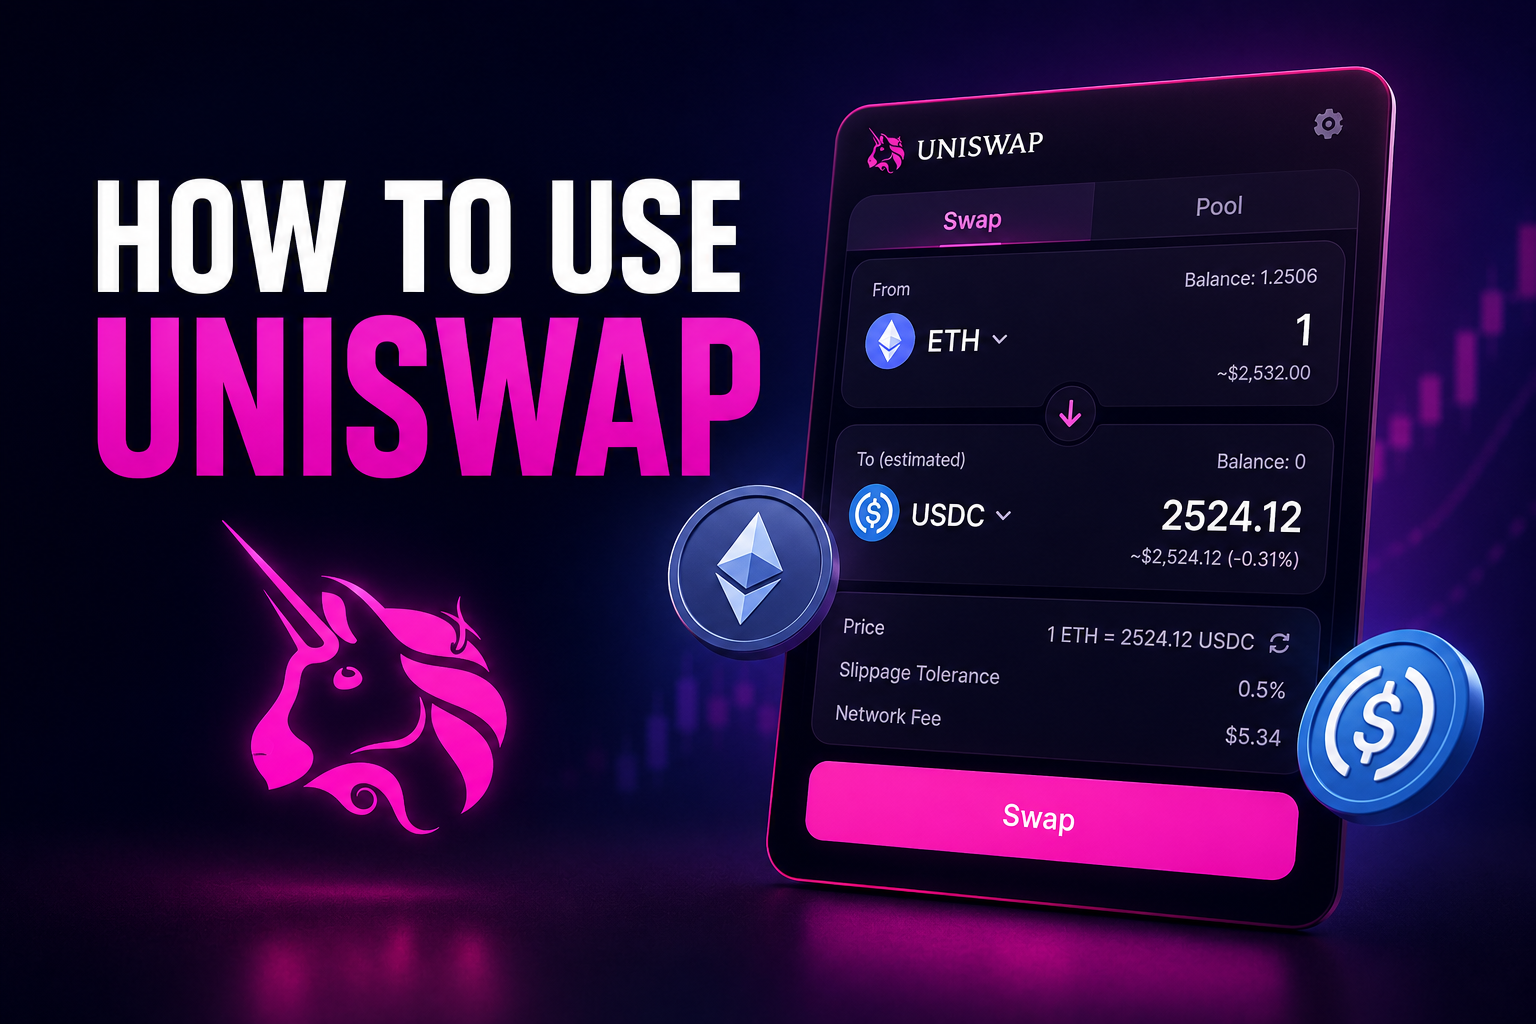
The Swap interface shows two boxes. The top box is the token you’re selling. The bottom box is the token you’re buying. Click the token selector in either box to search or paste a contract address.
For tokens that aren’t in the default list (most altcoins), paste the contract address from a trusted source — usually the project’s official site or a verified CoinGecko listing. Pasting a fake address is one of the most common DeFi scams. Always verify the contract address against two independent sources.
Enter the amount
Type the amount in either box. The other side updates automatically based on current pool prices. Uniswap also shows the dollar value, the price impact, the minimum received after slippage, and the route the swap will take.
Check the price impact. If it’s above 1%, your trade is moving the price. If it’s above 5%, reconsider.
Approve the token (first swap only)
For ERC-20 tokens, the first swap requires an “approval” transaction — a permission for Uniswap’s router to spend your tokens. You pay gas for this. It’s a one-time cost per token per router contract. Subsequent swaps of the same token skip this step.
ETH itself doesn’t need approval. Only ERC-20 tokens.
Confirm the swap
Click Swap. MetaMask pops up showing gas estimate and total cost. Review the numbers. Confirm in MetaMask. Wait 10–30 seconds for the transaction to confirm on-chain. Your wallet updates with the new token balance.
That’s it. You’ve used a DEX.
What can go wrong
The transaction might fail if gas is too low (rare with modern wallets), if slippage is exceeded (price moved before your tx confirmed), or if the pool runs out of liquidity (very rare on major pairs). Failed transactions still cost gas — you pay for the attempt even if it doesn’t complete.
Gas fees on Uniswap
Gas is the cost of running your transaction on the blockchain. On Ethereum mainnet, a Uniswap swap costs around 150,000 gas units. At a gas price of 30 gwei (a typical mid-day mainnet rate), that’s roughly $5–10 per swap. During congestion (NFT mints, major announcements, ETF news), the same swap can cost $40 or more.
L2s are where gas stops being a problem. The same swap on Arbitrum or Optimism costs $0.10 to $0.50. On Base it’s similar. On Polygon (a separate L1, not strictly an L2, but commonly grouped) it’s even cheaper.
Full breakdown of how gas works in gas fees explained.
What to do about gas
Three rules I follow.
One. Never swap on mainnet for trades under $1,000. The fees eat too much of the trade.
Two. Check the gas price before you swap. Etherscan’s gas tracker shows live numbers. If it’s above 50 gwei, wait an hour or two.
Three. If the token you want only trades on mainnet, accept the cost or use a CEX with a bridge. BitGet supports direct withdrawals to Arbitrum, Base, and Optimism, which means you can buy on a CEX and move funds to the cheap L2 without paying mainnet gas. The BitGet review covers the platform end-to-end.
Slippage settings — the trap beginners fall into
Slippage tolerance is the maximum price difference you’ll accept between when you sign the transaction and when it executes. Set it too low, the tx fails and you waste gas. Set it too high, you invite MEV bots to extract value from your trade.
What the default does
Uniswap defaults to “Auto” — usually around 0.5% to 1% depending on the pool. For deep pools (ETH/USDC, ETH/USDT) this is fine. For thin pools (new tokens, low-volume pairs), you might need to raise it to 3% or 5% to get the trade through.
Why high slippage is dangerous
When you set slippage to 10% or 15% on a thin pool, you’re telling the network “I’ll accept any price within 15% of the current quote”. MEV bots watch the mempool, see your transaction, and front-run you — they buy first, pushing the price up, then sell into your buy at the worst price you’ll accept, then your transaction completes at that bad price. They pocket the difference. This is called a sandwich attack.
I’ve watched a friend lose 12% on a $5,000 swap to a sandwich because they set slippage to 15% on a Uniswap V2 pool. The bot extracted around $600 in three blocks. Completely legal, completely invisible until they checked the transaction afterwards.
The right setting
For pairs with deep liquidity (top 50 tokens): 0.5% to 1%.
For pairs with moderate liquidity (top 200 tokens): 1% to 2%.
For thin pools (new launches, low-cap tokens): 3% to 5%, and ideally use a private RPC like Flashbots Protect or MEV Blocker to hide your transaction from the public mempool.
If slippage tolerance keeps failing your transaction, the pool is too thin for the size you’re trying to trade. Reduce the size or use a CEX.
MEV and sandwich attacks
MEV stands for Maximum Extractable Value. In plain English: bots watching the Ethereum mempool for transactions they can profit from by reordering or inserting their own transactions around yours.
How a sandwich attack works
- You submit a buy of token X with high slippage tolerance.
- A bot sees the transaction in the mempool before it confirms.
- The bot submits its own buy of token X with a higher gas price, executing first.
- The bot’s buy pushes the price up.
- Your buy executes at the new higher price.
- The bot immediately sells, pushing the price back down.
- The bot pockets the difference. You paid extra. You paid the gas.
This happens on every major DEX, including Uniswap. The Flashbots research team at Flashbots has published extensively on the topic and estimates MEV bots extract hundreds of millions of dollars per year from regular DeFi users.
How to protect yourself
Use a private mempool. Tools like MEV Blocker, Flashbots Protect, or CowSwap route your transaction so MEV bots can’t see it before confirmation. Most modern wallets including MetaMask now offer this as an option in settings — under “Advanced” or “Smart transactions”.
Use realistic slippage. The smaller the gap between minimum-received and expected, the less profit available for the bot.
Use a Layer 2. Most L2s have lower MEV exposure because the sequencer (the entity ordering transactions) doesn’t run public mempools the same way mainnet does. Not zero MEV, but significantly less.
If you’re trading volatile tokens on Ethereum mainnet without MEV protection, you’re paying a hidden tax on every transaction.
Providing liquidity — what nobody tells you
This is where DeFi yields look free until you check the maths.
How LP positions work
You deposit two tokens into a Uniswap pool in equal value (V2) or within a price range (V3). The protocol mints you an LP token (V2) or an NFT (V3) representing your share. As traders swap through the pool, you earn fees proportional to your share.
On a high-volume pool, fees can compound to APYs of 10% to 50%+. On thin pools, APYs can hit 200% or more — but those numbers come with risks the dashboards don’t display loudly.
Impermanent loss
This is the killer. When the price of one token in your pair moves significantly relative to the other, the AMM rebalances your position by selling the appreciating token and accumulating the depreciating one. You end up with less of the winner and more of the loser than if you’d just held both tokens.
The loss is called “impermanent” because it disappears if prices return to the ratio you deposited at. They often don’t.
Example: you deposit 1 ETH at $3,000 and 3,000 USDC into a pool. ETH doubles to $6,000. Your position rebalances to roughly 0.71 ETH and 4,243 USDC. You have 0.29 ETH less and 1,243 USDC more than you started with. Your total value is around $8,500. If you’d just held both tokens, you’d have $9,000. Impermanent loss = $500, or 5.5% of starting value.
Fees earned during the period would offset some of that — but if fees don’t exceed IL, you’re worse off than just holding.
When LPing makes sense
Pools where both tokens move together (ETH/stETH, BTC/WBTC) have minimal IL and earn fees from arbitrage. Stablecoin pools (USDC/USDT, DAI/USDC) have effectively zero IL and earn modest fees.
Pools with high volatility and unrelated assets (memecoin/ETH) have huge IL risk. The high APYs are compensating you for that risk. The risk often wins.
For a wider view on DeFi yield strategies, yield farming explained covers what works and what’s a trap.
Uniswap on L2s — Arbitrum, Optimism, Base
For most retail trading, mainnet Uniswap isn’t worth it. The fees eat too much. L2s are where DEX trading actually makes sense.
Arbitrum
Arbitrum is the largest L2 by TVL. Uniswap on Arbitrum has deep liquidity on the major pairs and many altcoin pairs. Gas costs $0.10 to $0.50 per swap. The user experience is identical to mainnet — same Uniswap interface, just connected to a different network.
Optimism
Similar profile to Arbitrum. Slightly smaller TVL, similar fees, slightly different ecosystem of tokens. Uniswap deployment is mature and well-used.
Base
Coinbase’s L2, launched in 2023. Massive growth in 2024 and 2025. Tons of new token launches. Gas costs comparable to other L2s. Uniswap’s deployment on Base is where a lot of memecoin trading now lives.
Polygon
Not strictly an L2 (it’s a sidechain), but commonly grouped. Uniswap on Polygon has been live for years. Gas costs are a fraction of a cent. The trade-off is that Polygon is less decentralised than Ethereum — different security model.
If you’re routinely swapping under $5,000 worth, L2s are the default. Mainnet is for whales and stuck assets.
When BitGet beats Uniswap
DeFi maximalists hate this section. It’s still true.
When CEX wins
Stable pairs. Buying USDT or USDC with fiat or with BTC, a CEX is faster and cheaper. No gas. No slippage. Spot fees are 0.10% on BitGet (affiliate) — usually cheaper than Uniswap’s combined gas + slippage + protocol fee.
Top 100 tokens. Any token listed on a major CEX is faster to trade there. No wallet connection, no approval transactions, no MEV. Just hit buy.
Large trades. $50,000+ in a thin DEX pool moves the price. The same trade on a CEX with order book depth fills at one price.
Fiat on/off ramps. Getting from a bank account to crypto is a CEX job. DEXs can’t take a credit card.
Recovery in case of error. Send to wrong address on Uniswap, it’s gone. CEX support can sometimes help with deposit issues.
When DEX wins
Long-tail tokens. Anything not listed on a major CEX. New launches, memecoins, niche DeFi tokens — Uniswap is often the only liquidity venue.
Privacy. No KYC, no signup, no account.
On-chain composability. You can chain a Uniswap swap with a Compound deposit, a lending position, an NFT mint, all in one transaction. CEXs can’t do that.
Sovereignty. Your wallet, your keys, your funds. No exchange can freeze them.
My rule
I default to BitGet for trades on top-200 tokens. I use Uniswap only when the token isn’t on a CEX, or when I need the on-chain action (LP positions, yield, NFTs). The fees and friction on a CEX are lower for most retail trades. The freedom and access on a DEX matter for the rest.
The crypto exchanges explained post covers the broader trade-off between CEX and DEX models.
For top-200 tokens, a CEX usually wins.
BitGet supports 800+ spot pairs, has 0.10% fees, and supports direct withdrawals to Arbitrum, Base, and Optimism if you want to move to a DEX later.
Affiliate link. I may earn a commission at no extra cost to you.
Securing your DEX activity with a hardware wallet
If you’re trading meaningful sums on Uniswap, a hardware wallet should be in the loop. MetaMask is fine for the connection layer — but the keys signing your transactions should ideally sit on a Ledger or similar device.
The setup: connect a Ledger (affiliate) to MetaMask, import your Ledger account into the MetaMask interface, and every Uniswap transaction prompts you to confirm on the Ledger screen. Even if your computer is compromised, the keys never leave the hardware.
The Ledger Nano X review covers the setup. The hot vs cold wallet post explains why the split matters.
For the broader security playbook including what to do if your seed phrase ever gets exposed, crypto scams guide is the read.
DEX strategy and structured learning
DEX trading isn’t the same skill as CEX trading. Different mechanics, different costs, different attack surfaces. If you want a structured walkthrough of how to think about DEX positioning, LP strategy, and MEV-aware execution, Trade Travel Chill is the community I’m part of. It’s the one structured education source I trust for DeFi strategy. Trade Travel Chill → (affiliate).
The DeFi modules cover Uniswap V3 concentrated liquidity, MEV protection, gas optimisation, and how to think about LP positions as options rather than passive yield.
Ready to compare CEX vs DEX?
Set up a BitGet account, buy ETH there at 0.10% fees, then withdraw to an L2 like Base or Arbitrum and try Uniswap with cheap gas. The full pipeline in one afternoon.
Affiliate link.
Frequently asked questions
Is Uniswap safe to use?
The Uniswap protocol itself has been audited extensively and has been running without major exploits since 2018. The risks come from the tokens you trade (scams, honeypots), the slippage you set (sandwich attacks), and the front-ends you use (phishing sites). Always use the official URL app.uniswap.org and verify contract addresses against multiple sources.
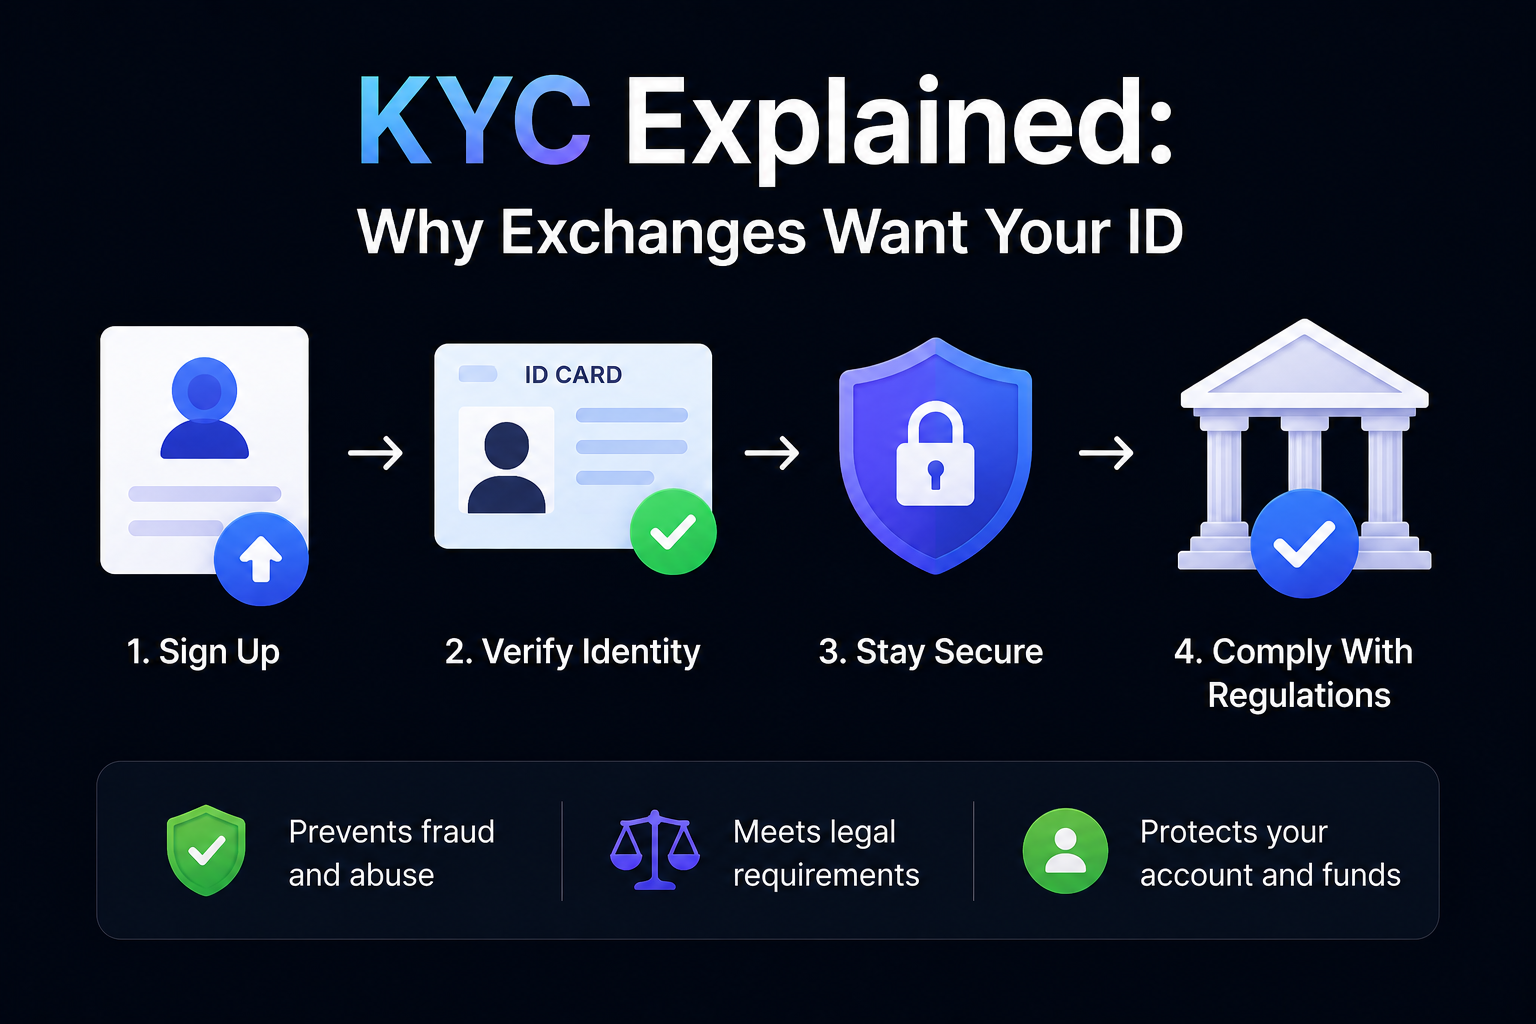
Do I need to KYC to use Uniswap?
No. Uniswap is a decentralised protocol. There’s no signup and no identity verification. You connect a wallet and trade. Some regions block access to the front-end at app.uniswap.org via IP filtering, but the underlying smart contracts remain accessible to anyone who can interact with Ethereum.
How much does Uniswap charge?
Uniswap pools charge an LP fee — typically 0.05%, 0.30%, or 1% depending on the pool tier. Uniswap Labs (the company) charges a small additional fee on swaps through their hosted front-end, around 0.25%. Gas fees are separate and depend on the network — cents on L2s, several dollars on mainnet.
What’s the difference between Uniswap and a CEX?
A CEX like BitGet holds your funds, runs an order book, and matches buyers with sellers. You sign up with email and KYC. Uniswap is a smart contract — you hold your own funds in a wallet, and the protocol uses liquidity pools instead of order books. No signup, no KYC, but more friction and gas fees.
Can I lose money providing liquidity on Uniswap?
Yes. Impermanent loss can outweigh fee income, especially in volatile pairs. Concentrated liquidity in V3 amplifies both the upside and the downside. Stablecoin and pegged-asset pools (USDC/USDT, ETH/stETH) have the lowest IL risk.
What’s the cheapest network to use Uniswap on?
Polygon, Arbitrum, Optimism, and Base all offer Uniswap swaps for under $1 in gas in most conditions. Avoid Ethereum mainnet for small swaps — the gas eats too much of the trade.
Is Uniswap better than Binance or BitGet?
For top-listed tokens, CEXs are cheaper and faster. For long-tail tokens not listed on any CEX, Uniswap is often the only liquidity venue. The right answer depends on what you’re trading.
What is slippage on Uniswap?
Slippage tolerance is the maximum price difference you’ll accept between when you sign the transaction and when it executes. Set too low, the transaction fails. Set too high, MEV bots can sandwich your trade. Stick to 0.5% to 2% for normal pairs and use a private RPC for thin-pool trades.
Final word
Uniswap is a powerful tool that beginners frequently use to harm themselves. The interface is clean, the mechanics are simple to look at, and the actual costs are buried three layers deep in slippage, MEV, gas, and impermanent loss.
If you only ever trade top-200 tokens, a CEX will serve you better 90% of the time. If you need the long-tail access — new launches, niche DeFi, on-chain composability — Uniswap is actually the best tool for the job. Just go in with the slippage set right, the gas understood, the MEV-protected RPC turned on, and never approve unlimited token spending unless you’ve audited the contract.
If I were starting again today, this is the order I’d do it in:
- Set up a CEX account for fiat on-ramp.
- Set up MetaMask and add an L2 like Base or Arbitrum.
- Bridge or withdraw $50 worth of ETH to the L2.
- Make your first swap on Uniswap with 1% slippage and watch the numbers.
- Pay attention to the price impact and the actual amount received.
- Only then think about LPing.
Right — over to you.
Related posts
- How to Use MetaMask: A Beginner’s Setup and Safety Guide
- Gas Fees Explained: What You’re Actually Paying For
- Yield Farming Explained: What Works and What’s a Trap