The first time I sent Bitcoin to someone else I sat staring at the “confirm” button for about three minutes. The address looked right. The amount looked right. The fee looked right. But the thing about Bitcoin is once you press confirm there is no undo button. There is no support line. There is no chargeback. If the address was wrong, the BTC is gone.
That was about £80 worth of Bitcoin in late 2020. I sent it. It arrived. Nothing bad happened. But the lesson stuck — every Bitcoin transaction is one-way, permanent, and irreversible. Most of this post is the routine I built to make sure I never send to the wrong place.
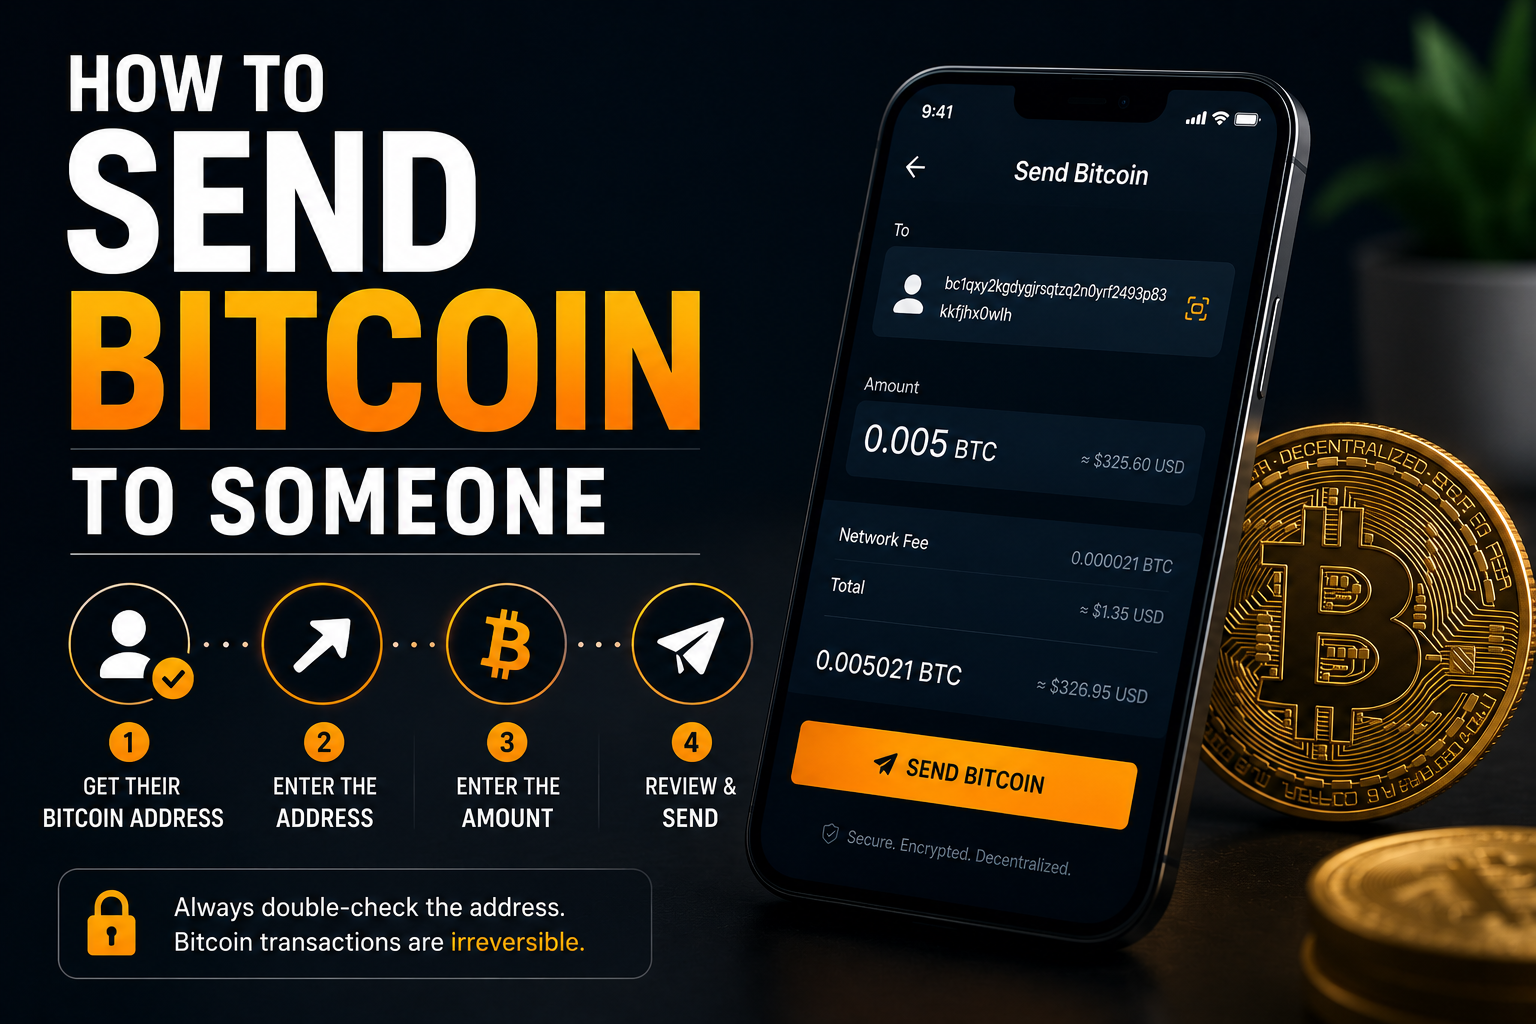
Short answer: To send Bitcoin to someone: get their Bitcoin address (a long string starting with 1, 3, or bc1), open your wallet or exchange, choose Send, paste the address, double-check the first and last characters match, pick the network (Bitcoin mainnet for most sends; Lightning for small fast payments), enter the amount, set the fee, send a tiny test transaction first if it’s a large amount, then send the rest once the test confirms. Bitcoin transactions are irreversible. Always check the address twice.
Open BitGet to send and receive Bitcoin → (referral link)
Key takeaways
- A Bitcoin address is what identifies a wallet. Different types (Legacy, SegWit, Native SegWit/Bech32, Taproot) all work but fees differ.
- Pick the right network. Bitcoin mainnet is the default. Lightning Network is for small fast payments. Other networks (BEP-20, Polygon “Wrapped BTC”) are different tokens — not actual Bitcoin.
- Always send a small test transaction first when sending a large amount or sending to a new address.
- Network fees are paid in sats per byte (sat/vB). They change with network congestion. Median Bitcoin confirmations land in about 10 minutes; busy times can stretch much longer.
- The most common ways people lose Bitcoin: wrong address, wrong network, address-poisoning malware, and clipboard hijacking.
Table of contents
- Short answer: the actual steps
- Bitcoin address types — Legacy, SegWit, Native SegWit, Taproot
- Picking the right network
- How to send Bitcoin from BitGet
- How to send Bitcoin from Ledger Live
- The mandatory test transaction habit
- Bitcoin fees explained (sats per byte)
- How long Bitcoin confirmations take
- Lightning Network — for fast small payments
- Common mistakes that lose people money
- How to receive Bitcoin
- QR codes vs typed addresses
- Frequently asked questions
Short answer: the actual steps
Boiled down, sending Bitcoin to someone else takes five steps:
- Get their Bitcoin address. A string of letters and numbers, usually 26 to 62 characters long, starting with 1, 3, or bc1.
- Open your wallet or exchange and choose Send.
- Paste the address. Verify the first 4 and last 4 characters match what they sent you.
- Choose the network (Bitcoin mainnet unless you have a specific reason otherwise).
- Enter the amount, choose a fee, confirm.
Below is what each of those means in detail, and the things that can go wrong inside each step.
If you don’t yet own any Bitcoin, the how to buy Bitcoin guide is where you start. Once you’ve got some, the steps below cover sending it anywhere.
Bitcoin address types — Legacy, SegWit, Native SegWit, Taproot
You’ll see four address formats. They all work for sending and receiving Bitcoin. They differ in fee efficiency and which wallets support them.
Legacy (P2PKH) — addresses start with 1
Example: 1A1zP1eP5QGefi2DMPTfTL5SLmv7DivfNa (the genesis block address).
The original Bitcoin format from 2009. Higher transaction fees per send because the addresses are less data-efficient. Supported by every wallet ever made. Still common on older exchanges.
Pay-to-Script-Hash (P2SH) — addresses start with 3
Example: 3J98t1WpEZ73CNmQviecrnyiWrnqRhWNLy
Introduced in 2012. Used for multi-signature wallets and as a wrapper for SegWit addresses. Most exchange withdrawal addresses are this format because it’s backward-compatible. Lower fees than Legacy.
Native SegWit / Bech32 — addresses start with bc1q
Example: bc1qar0srrr7xfkvy5l643lydnw9re59gtzzwf5mdq
The 2017 SegWit upgrade in its native form. Lower fees than Legacy or P2SH (smaller transactions). Now the default in most modern wallets, including Ledger. Exchange withdrawals to Bech32 typically cost less than to Legacy.
Taproot / Bech32m — addresses start with bc1p
Example: bc1p0xlxvlhemja6c4dqv22uapctqupfhlxm9h8z3k2e72q4k9hcz7vqzk5jj0
The 2021 Taproot upgrade. More privacy features, support for more complex scripts, smallest fees. Some exchanges have been slow to add Taproot withdrawal support — check before assuming.
Which address type should you use?
For receiving, Native SegWit (bc1q) is the modern default. Lower fees, broad support.
For sending, you use whatever the recipient gave you. You don’t choose — they do. Your wallet handles the format conversion.
What if the address starts with something else?
If a “Bitcoin” address starts with 0x — that’s an Ethereum address, not Bitcoin. Sending Bitcoin to an Ethereum address loses the Bitcoin permanently.
If a “Bitcoin” address starts with T — that’s a Tron address. Same outcome.
If a “Bitcoin” address starts with M or L — that’s Litecoin. The networks look similar but they aren’t the same.
Always verify the first character matches Bitcoin’s format (1, 3, bc1q, bc1p) before sending.
Picking the right network
This is where most people who lose money lose money. Bitcoin exists on the Bitcoin network. But many exchanges offer to send “BTC” over alternative networks for lower fees. Choose wrong and the BTC arrives at a wallet that can’t see it.
Bitcoin (mainnet)
The original Bitcoin network. The actual Bitcoin blockchain. This is what 99% of sends should use.
Lightning Network
A layer-2 network built on top of Bitcoin. Used for small fast payments. Different address format (starts with lnbc...). Different fee structure (very low). Only use if the recipient explicitly says they want Lightning. Covered in detail below.
BEP-20 (BNB Smart Chain)
This is not real Bitcoin. It’s a token called BTCB on Binance Smart Chain that’s pegged to Bitcoin’s price. Some exchanges offer “BTC on BEP-20” as a withdrawal option because the fees are pennies. Only use this if the receiving wallet supports BEP-20 BTC. Sending it to a regular Bitcoin wallet loses the funds.
Wrapped BTC on Ethereum, Polygon, etc.
Similar to BEP-20 BTC. These are wrapped tokens (WBTC, renBTC, etc.) representing Bitcoin on other chains. Useful for DeFi on those chains. Not interchangeable with real Bitcoin. Sending WBTC to a Bitcoin address loses the funds.
The rule
If you are sending to someone and they gave you a Bitcoin address, use the Bitcoin network. Pay the network fee. Don’t try to save money by using a different network unless you’ve explicitly confirmed they can receive it on that network.
BitGet withdrawals shows network selection screenshots.
How to send Bitcoin from BitGet
If your Bitcoin lives on a BitGet spot account, the send flow is:
- Log in to BitGet (web is easier than app for first-time sends).
- Navigate to Assets → Withdraw.
- Select BTC as the coin.
- Select Bitcoin as the network. Don’t select BEP-20, Lightning, or any other unless you specifically need to.
- Paste the recipient address. BitGet will validate the address format — if it shows red, you’ve copied something wrong.
- Enter the amount. BitGet shows the withdrawal fee (typically around 0.0001 BTC).
- Verify the destination address one more time. Compare first 4 and last 4 characters.
- Click Withdraw.
- Confirm with 2FA / email code.
- Wait for the email confirmation step. Some withdrawals require an additional email click to release.
For larger amounts (the threshold varies by your account history), BitGet may pause the withdrawal for an additional review period. This is normal — it’s the same anti-theft hold every regulated exchange runs.
The full walkthrough with screenshots is in the BitGet withdrawals post.
How to send Bitcoin from Ledger Live
If your Bitcoin lives on a Ledger Nano X, the flow is:
- Open Ledger Live on your computer or phone.
- Connect your Ledger device, unlock with PIN.
- Open the Bitcoin app on the device (Ledger Live prompts you).
- Click Send in Ledger Live.
- Select the Bitcoin account you’re sending from.
- Paste the recipient address.
- Enter the amount.
- Choose the fee level (Low / Medium / High / Custom).
- Review on the Ledger Live screen.
- Confirm on the Ledger device itself — the device shows the address one character at a time so you can verify it matches what’s on your screen.
- The transaction is signed and broadcast.
The Ledger device verification step is the critical one. If your computer is compromised by clipboard-hijacking malware, the address on Ledger Live might show one thing while the actual broadcast address is different. The Ledger device displays the address it’s actually signing. Always check the device matches your screen.
This is the reason hardware wallets exist. Hot wallets and exchange withdrawals don’t have this safety check.
The full setup walkthrough is in the how to store crypto safely guide.
The mandatory test transaction habit
This is the single piece of advice that has saved more Bitcoin holders than every guide combined.
If you are sending more than a small amount, send a test transaction first.
What “small” means is up to you. I treat anything over £1,000 as worth the £1 test. I’d guess most experienced traders do the same.
How a test transaction works
- Send a tiny amount first — say £5 to £20 worth of Bitcoin.
- Wait for it to confirm at the destination (usually 10–30 minutes for a single confirmation).
- Confirm the recipient sees it.
- Then send the rest.
The test catches:
– Wrong address copied (test arrives somewhere wrong → you immediately know not to send the rest)
– Wrong network selected (test doesn’t arrive → you check what happened)
– Recipient wallet doesn’t support the address type (rare with modern wallets but happens with older custodial services)
– Network congestion delaying confirmation (you can see the delay before committing the full amount)
A test transaction costs you the network fee. The fee is a few dollars. The protection from sending five figures to the wrong address is unlimited.
I send a test transaction every time I send Bitcoin to a new destination address, and every time I haven’t used a destination address in over six months. Yes, even with addresses I think I know.
Bitcoin fees explained
Bitcoin transaction fees aren’t a percentage of the amount sent. They’re paid in satoshis per virtual byte (sat/vB) — the size of the transaction in bytes times the per-byte rate.
A typical send transaction is around 140 to 250 bytes. At 30 sat/vB that’s roughly 4,200 to 7,500 sats — a few dollars.
What sets the fee level
Bitcoin block space is limited. Miners include transactions sorted by fee per byte. If you pay a high fee per byte, you’re included in the next block. If you pay a low fee, you wait until a quiet moment.
Fees rise during high network activity (post-halving runs, NFT/Ordinal congestion, major bull market days). Fees fall during quiet periods (weekends, sideways markets).
What’s a “normal” fee?
This changes constantly. I check mempool.space before any non-urgent send. It shows the current fee tiers:
- High priority (next block): typically 30–80 sat/vB during normal conditions
- Medium priority (3–6 blocks): typically 20–40 sat/vB
- Low priority (next hour or longer): typically 5–15 sat/vB
In severe congestion these numbers spike — I’ve seen high priority hit 300+ sat/vB during peak Ordinal activity. In a deep weekend lull they can fall to single digits.
Choosing the right fee
For sends I want done now (paying someone who’s waiting, time-sensitive transactions), I pay the high tier.
For sends that can wait (moving to my Ledger for cold storage), I pay the low tier and let the transaction sit overnight.
For everything in between, I pay the medium tier.
Wallets like Ledger Live and exchange withdrawal screens usually offer Low / Medium / High presets that approximate these tiers. Custom fees are available if you want precision.
What happens if your fee is too low
The transaction sits unconfirmed in the mempool. It can wait hours or days. If network congestion clears, miners eventually pick it up.
If your fee is so low it gets dropped by the mempool (a few weeks of waiting), the transaction expires and the BTC stays in your wallet — you didn’t lose it, the send just didn’t happen.
You can also Replace-By-Fee (RBF) — broadcast a new version of the same transaction with a higher fee, replacing the original. Most modern wallets support this. Useful if you set the fee too low.
How long Bitcoin confirmations take
This is the question people new to Bitcoin ask most often. The answer is “about 10 minutes for the first confirmation, but with significant variation.”
The 10-minute median
Bitcoin’s protocol targets one new block every 10 minutes on average. The next block contains your transaction (if fee is sufficient). That gives you 1 confirmation.
In practice, blocks arrive in a Poisson distribution. Sometimes two blocks in 30 seconds. Sometimes a 45-minute gap between blocks. The 10-minute number is a long-run average, not a guarantee.
How many confirmations do you need?
For most exchanges to credit a Bitcoin deposit:
- Small amounts ($100 or less): 1 confirmation, ~10 minutes
- Medium amounts ($100 to $10,000): 2–3 confirmations, ~20–30 minutes
- Large amounts ($10,000+): 6 confirmations, ~60 minutes
Different exchanges have different policies. BitGet credits Bitcoin after 1 confirmation for most amounts.
For self-custody transfers (you sending to your own Ledger), you can consider the transaction effectively final at 1 confirmation.
For irreversible commerce (someone selling you a car for BTC), 6 confirmations is the convention. After 6 blocks, the probability of a reorg reversing the transaction is approximately zero.
Why your transaction might take longer
- Low fee: miners are skipping you. Wait, or use RBF to bump the fee.
- Network congestion: lots of transactions waiting, everyone’s fees are high. Patience or higher fee.
- Receiving exchange is slow: the BTC may have confirmed on-chain hours ago but the exchange hasn’t credited your account. Check the explorer first, then contact support if confirmed but uncredited.
- The transaction never made it to a node: rare, usually a wallet bug. Try rebroadcasting.
You can always check the status of a Bitcoin transaction on a block explorer like mempool.space or blockchain.com. Paste the transaction ID (TXID) and you’ll see live confirmation count.
Lightning Network — for fast small payments
The Lightning Network is a layer built on top of Bitcoin for fast, low-fee small payments. It exists because the base layer was never designed to handle coffee-shop transaction volume.
How Lightning differs
- Confirmation: instant. Sub-second.
- Fees: typically fractions of a cent.
- Address format:
lnbc...for invoices, or Lightning addresses that look like email (username@example.com). - Amount limits: practical maximum per payment is around 0.1 BTC, often less depending on the channel routing available.
When to use Lightning
- Paying for small things (a podcast, a tip, a streaming subscription)
- Sending small amounts to a friend who also has a Lightning wallet
- Quick on-the-go transactions where you don’t want to pay base-layer fees
When not to use Lightning
- Large transfers (channel liquidity may not support it)
- Long-term holding (Lightning is for transit, not storage)
- Sending to anyone who doesn’t have a Lightning wallet
Lightning on exchanges
Many exchanges including BitGet support Lightning withdrawals. The fee is usually 0 or a fraction of a sat. The catch: you’re sending to a Lightning invoice (the lnbc... string), not a Bitcoin address. They’re not interchangeable.
If someone gives you a regular Bitcoin address, you cannot send via Lightning. If someone gives you a Lightning invoice, you cannot send via mainnet Bitcoin.
Lightning wallets
Standalone Lightning wallets: Wallet of Satoshi (custodial, easy), Phoenix (non-custodial), Breez (non-custodial), Muun (mixed). Each has different trade-offs between ease and self-sovereignty.
I keep a small Lightning wallet (a few hundred sats) for small payments. The bulk of my Bitcoin sits on mainnet in cold storage. The Lightning wallet is for transit.
Common mistakes that lose people money
The classic ways to lose Bitcoin while sending. Read these and don’t be the cautionary tale.
Mistake 1: Wrong address
You copied the address from somewhere, but it wasn’t the right address. Maybe an old chat. Maybe a phishing email pretending to be your friend. Maybe a fake QR code at an event.
Defense: always verify the address with the recipient through a second channel. If they DM’d you the address on Telegram, voice-call them and have them read it. The double-check catches almost every wrong-address attempt.
Mistake 2: Wrong network
You selected BEP-20 BTC to save fees, but the recipient wallet only supports mainnet Bitcoin. Funds arrive at a BSC address the recipient cannot see.
Defense: unless you’ve specifically discussed the alternate network with the recipient, always use Bitcoin mainnet.
Mistake 3: Address-poisoning attacks
A relatively new attack. Malware monitors your clipboard. When it detects you’ve copied a Bitcoin address, it silently replaces it with an attacker’s address. You paste, send, and the BTC goes to the attacker.
Defense:
– Always verify the pasted address matches what you copied.
– On hardware wallets, verify on the device screen, not just the computer screen.
– Use Tor or a clean device for large sends if you’re paranoid.
Mistake 4: Sending to a defunct address
You’re sending to a wallet that hasn’t been used in years. The seed phrase has been lost. Maybe the recipient changed phones and never restored. The BTC arrives but nobody can access it.
Defense: confirm with the recipient that they currently control the address before sending anything material.
Mistake 5: Sending to an exchange deposit address from your own wallet without the memo
Some exchanges (more common with other coins than Bitcoin, but possible) require a memo or destination tag along with the address. Bitcoin doesn’t normally use memos, but exchange-specific deposit flows sometimes do.
Defense: read the deposit instructions on the receiving exchange. If a memo is required, include it.
Mistake 6: Typing the address manually
Typos. Even one character wrong and the funds go to a different address (or to nowhere if it’s an invalid format).
Defense: always copy-paste or scan a QR code. Never manually type a Bitcoin address.
Mistake 7: Confirming on a compromised device
Your laptop has malware. You connect your hardware wallet. The malware replaces the address you see on the laptop screen, but the actual transaction signed is going elsewhere.
Defense: always verify the destination address on the hardware wallet’s own screen. This is the entire point of a hardware wallet. Skipping this step makes you no safer than a hot wallet.
How to receive Bitcoin
This is the easier side of the transaction but worth covering.
Step 1: Open your wallet or exchange
In BitGet: Assets → Deposit → BTC → Bitcoin network.
In Ledger Live: Receive → Bitcoin account.
In a hot wallet: Receive button.
Step 2: Get your receiving address
The wallet generates an address. Most modern wallets generate a fresh address every time for privacy — that’s normal and expected. The old address still works; you just don’t have to reuse it.
Step 3: Share the address
Send the address to the person sending you Bitcoin. Either:
– Copy and paste the text address
– Share the QR code (cleaner, less typo risk)
– Use a Lightning address if they’re sending via Lightning
Step 4: Verify it on your hardware wallet
If you’re receiving to a Ledger, click “Verify on device” in Ledger Live. The Ledger shows the address on its screen. Compare it to the address on Ledger Live. If they match, the address is genuine and not malware-replaced.
Step 5: Wait for confirmations
After they send, the transaction appears as “pending” or “unconfirmed” in your wallet. Each new block adds a confirmation. Once enough confirmations roll in, the BTC is yours to spend.
QR codes vs typed addresses
The two main ways to share a Bitcoin address. Both work. They have different failure modes.
QR codes
Pros: zero typo risk if the QR encodes correctly. Fast.
Cons: the QR can be tampered with. A malicious sticker placed over a real QR at a Bitcoin ATM has stolen funds in the past. Always verify the address shown after scanning, before you confirm.
Typed/pasted addresses
Pros: the data is what you see — no surprise.
Cons: typo risk if you type. Clipboard malware risk if you copy and don’t verify.
Best practice
Use QR for in-person transfers where you can see the screen generating it (the recipient’s own device).
Use copy-paste-verify for remote transfers where you can confirm the address through a second channel.
Never type Bitcoin addresses manually.
Need somewhere to actually buy and send Bitcoin?
BitGet handles spot purchases, withdrawals to your own wallet, and supports Lightning withdrawals if you need small fast sends. Sign-up takes 90 seconds, KYC usually clears same day.
Referral link.
My actual workflow for any send over £1,000
This is the routine I run every time. If it sounds paranoid, that’s because Bitcoin transactions are irreversible and the time spent being careful is always cheaper than the time spent losing money.
- Get the address through a verified channel. If it’s a friend, voice-call them. If it’s an exchange deposit, log into the exchange myself rather than trust a screenshot.
- Paste into the wallet. Verify the first 4 and last 4 characters match. Some malware only replaces the middle of the address, so checking the ends is sufficient most of the time, but a full check is better.
- Send a small test. Around £5 to £20 worth.
- Wait for the test to confirm at the destination. Around 10 to 30 minutes.
- Confirm with the recipient that they see the test.
- Send the rest. Same address, same network, same wallet.
- Save the TXID. Both for the test and the main send. If anything goes weird, the TXID is what you give to support.
Total time: 30 to 60 minutes for a large send. Yes, slower than just clicking send. The slowness is the safety.
What about fees on the recipient’s side?
There aren’t any. Bitcoin only charges fees to senders. The recipient can receive any amount without paying a network fee.
If you send 1 BTC and the fee is 0.0001 BTC, the recipient receives 1 BTC and the network takes 0.0001 BTC from you. The recipient sees 1 BTC arrive.
(Some custodial services or exchanges charge their own internal deposit fees, but the Bitcoin network itself does not.)
Cross-border Bitcoin sends — is it different?
No. The Bitcoin network doesn’t care about country borders. A Bitcoin send from a London wallet to a Bangkok wallet is identical to a Bitcoin send across the street.
What can differ:
– Off-ramp on the other side: if the recipient needs to convert to local currency, how to cash out crypto covers options.
– Regulatory reporting: cross-border transfers above certain thresholds may require reporting in either jurisdiction. Talk to an accountant if amounts are material.
– Sanctions: don’t send Bitcoin to sanctioned jurisdictions or addresses. Major exchanges block these anyway, and there are legal consequences.
For ordinary peer-to-peer sends across borders, Bitcoin is the same transaction regardless of geography.
Frequently asked questions
How do I send Bitcoin to someone else?
Get their Bitcoin address, open your wallet or exchange, choose Send, paste the address, select the Bitcoin network, enter the amount, set the fee, and confirm. For amounts above what you’d be comfortable losing, send a test transaction first.
How long does it take to send Bitcoin?
About 10 minutes for the first confirmation on average, sometimes faster, sometimes longer depending on network congestion and the fee you pay. For irreversible commerce, six confirmations (around 60 minutes) is the convention.
What’s the minimum amount of Bitcoin I can send?
The protocol minimum is 1 satoshi (0.00000001 BTC). In practice, the “dust limit” — the smallest amount that’s economical to send — depends on current fees. Sending less than the fee itself doesn’t make sense.
What’s the maximum amount of Bitcoin I can send?
No protocol maximum. Single transactions of thousands of BTC have been recorded on-chain. Exchange withdrawal limits may apply on the sending side.
Can I cancel a Bitcoin transaction?
If it hasn’t been confirmed, you can sometimes Replace-By-Fee (RBF) with a higher fee, effectively rerouting the same inputs to a different output. Once confirmed, the transaction cannot be reversed.
What happens if I send Bitcoin to the wrong address?
If the address is valid but wrong (an address you didn’t mean to send to), the funds are gone unless the address owner returns them. If the address is invalid format, the wallet would reject it before broadcasting.
Why is my Bitcoin transaction taking so long?
Most likely the fee was too low for current network conditions. Check the transaction on mempool.space — if it’s sitting unconfirmed, you can wait, or use Replace-By-Fee to bump the fee.
Can I send Bitcoin without an internet connection?
You need internet to broadcast the transaction, but the signing can happen on an air-gapped device. Hardware wallets like Ledger or Trezor sign offline, then you broadcast through Ledger Live or another connected client.
Is sending Bitcoin anonymous?
No. Bitcoin transactions are pseudonymous — addresses don’t directly identify people, but on-chain analysis can often link addresses to identities, especially if you’ve used a KYC exchange. For privacy, look into CoinJoin, Lightning, or privacy-focused chains (different topic).
Do both parties need a Bitcoin wallet to send Bitcoin?
The sender needs a wallet (or exchange account that supports withdrawals). The recipient needs an address. The recipient’s address can come from a wallet, an exchange, a custodial service, or a paper wallet. They don’t need to have downloaded any app yet — they just need an address.
What is a Bitcoin transaction ID (TXID)?
A unique identifier for the transaction. A long string of letters and numbers. Used to look up the transaction on a block explorer. Save it for your records, especially for large sends.
Can I send fractions of a Bitcoin?
Yes. Bitcoin is divisible to 8 decimal places. The smallest unit is a satoshi (1 sat = 0.00000001 BTC). Most sends are fractions.
Ready to start?
If you’re going to be sending Bitcoin regularly, hold the bulk on a hardware wallet and keep a smaller spending balance on an exchange. The Ledger Nano X is the device I use for cold storage.
Affiliate link.
Final word
Sending Bitcoin is mechanically simple once you’ve done it a few times. The hard part is the discipline — verifying addresses, picking the right network, testing before committing. Get those right and it stops feeling scary.
If I were teaching a beginner today, I’d send them through this checklist before their first real send:
- Buy a small amount of Bitcoin you can afford to lose. The how to buy Bitcoin guide covers this.
- Set up a personal wallet — either a Ledger or a reputable software wallet.
- Send a tiny amount from the exchange to your wallet. Practice the flow.
- Once you’ve watched that work, you understand the process well enough for real sends.
- For any meaningful amount, always send a test transaction first.
- Save the TXID of every send.
The cost of the practice run is a couple of pounds of network fees. The benefit is you never lose a five-figure send to a copy-paste error.
That’s the short version.
Right — over to you.
Related posts
- How to Buy Bitcoin: A Step-by-Step Guide
- How to Store Crypto Safely: The Self-Custody Guide
- Ledger Nano X Review: The Hardware Wallet I Use